In order to get the most out of this exercise, I needed to understand what noise was. I knew that there was a relationship between the amount of graininess on an image and the sensitivity of the film (ISO) but not what caused it or how to avoid it. I was aware that on processing an image in RAW software (DPP), the programme knew if I had used a Canon lens and suggested noise reduction. Frye (2009), explained that “noise is not evenly distributed: it’s more prominent in shadows.” He suggested it is “exacerbated by high ISO’s and long exposures.” His remedy for noise is prevention by using the correct exposure, and if that is not possible to take two or more images and combine in software or use noise reduction software. I agreed with the fact that correct exposure where possible is the best option, but still needed to understand the issue further in order to know how to avoid it. I was unaware that my camera could help with long exposure noise.
Looking at the Canon customer support website (as there was nothing in my camera manual), I found that I had two custom functions for noise control. One allowed me to turn on or off noise reduction for long exposures and the other allowed noise reduction at high speed ISO.
By reading around the subject further, I discovered that noise is unwanted detail which is visible as a graininess on the image. It occurs when the image is taken because “artefacts or errors are introduced into the image by electrostatic charge”. Freeman (2011) Freeman describes 5 different types of noise in his book, photon noise, readout noise, random noise, dark noise (long exposure noise) and reset noise. I had not appreciated before studying this exercise how a camera’s sensor works and that when a speck appears on an image, if it isn’t a dust spot it is likely to be photon or random noise.
This exercise involved combining sharp detail and textureless areas (for example a white wall) where some of the textureless area was in shadow with daylight indoors to investigate a range of ISO the relationship between ISO and noise with my camera. Aperture priority, a tripod and exposure times of less than 1/2 second were required so that noise from long exposure was not an issue.
F4 1/10 ISO 100 47mm
ISO 200

F4 1/20 ISO 200 47mm

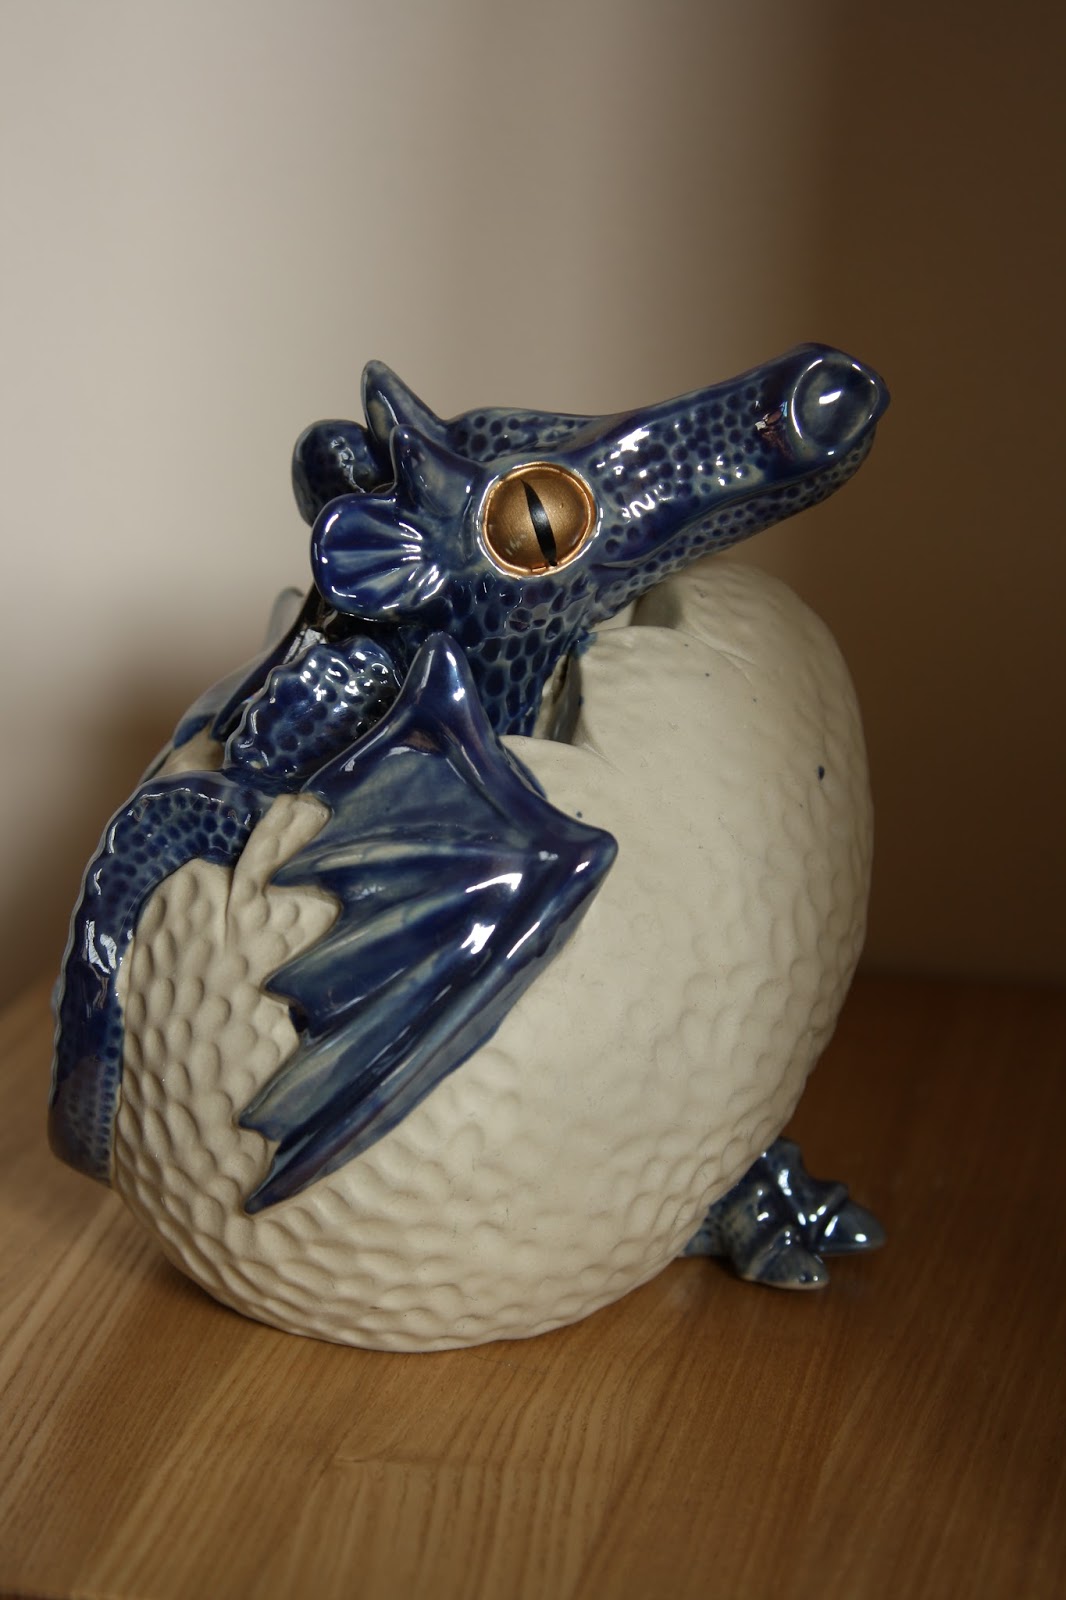
At ISO200, there is some noise starting to appear in the darkest shadows as grain. Compared to ISO 100, it is quite noticeable. If I was taking an indoor scene on a tripod, I would probably not use this setting.

F4 1/45 ISO 400 47mm

At ISO400, noise is showing on the egg. The dragon’s feet are of an unacceptable quality. If I was shooting indoors with no tripod, I would use this setting. Having looked at where noise appears, it is now something to be aware of.

F4 1/90 ISO 800 47mm

At this ISO sensitivity, there is noise showing under the dragon’s eye. The table is unacceptable – the area is too grainy looking. The noise immediately appears worse on the plain areas of wall which are in the shadow.

F4 1/180 ISO 1600 47mm

This image looks very noisy. It is present around the eye which is not visible in the previous photos. I think the eye itself shows little noise present because the texture masks the effect of the noise. This photo is definitely unacceptable.
Having completed this exercise and compared the results at different ISO speeds, I agree with the quote from Frye (2009) cited above, that “noise is not evenly distributed: it’s more prominent in shadows.” I would qualify this by explaining that it seems that there is a relationship not only between the sensitivity (film speed) and amount of noise, but also the darker the area in the photo, the more noise is visible.
Freeman, M, 2011,The digital SLR handbook, Ilex Press, Lewes, UK P58
Frye, M, 2009, In the footsteps of Ansel Adams and the great masters, Digital Landscape Photography, Ilex Press, Lewes, UK P14
http://www.canon.co.uk/support/consumer_products/products/cameras/digital_slr/eos_1000d.aspx?faqtcmuri=tcm:14-782478&page=1&type=faq accessed 27/8/13
(29/8/13 – On viewing my photos from today, I have several images which demonstrates photon/ random noise in the same area. I took two sets of images; one at F11 ranging from 1/100 to 1/750 ISO 100, and the pixelated area appeared at nearly the same place on all of them (right spire). The other set, taken at F19 between 1/90 and 1/180 at ISO100 also show the same pixelated spot. As the value of RGB at this pixel adds up to 227 with red being the highest, I did not think it was from a channel being blocked (although the histogram was clipped to the left (shadows). I think it is unacceptable noise.)

No comments:
Post a Comment