Test Shots for Assignment 5 - Personal Project (December 2013-February 2014)
Day 1 Test Day - Newark on Trent 17/12/13
- Minimalist kit - camera Canon1000D and 1 lens 70-200mm (EFL112-320)
- Transport - bike (12 miles to cover)
- Trial run to see what effects could be achieved (10 bridges in Newark)
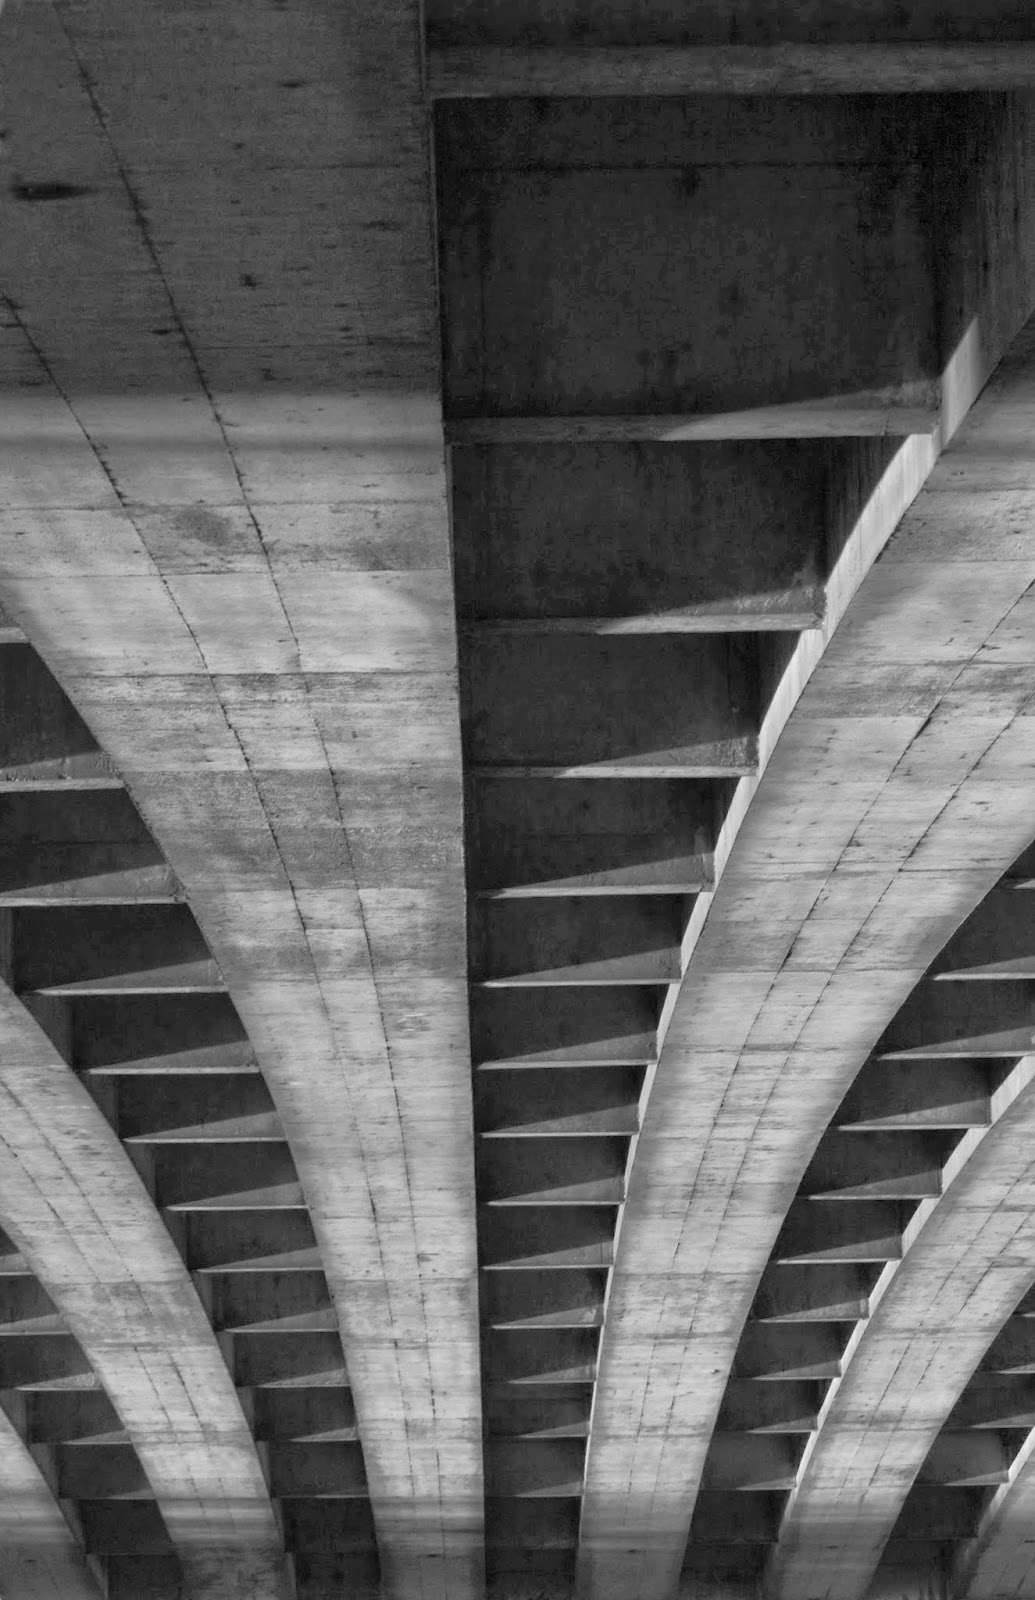
Mill Bridge, Newark on Trent
Image 1 - Uninspiring, too much renovation work in image. Car is focal point. Distracting post in river. Reflection not still enough. Slightly overexposed despite bracketing. Bridge lost. Converted to monochrome to see if colours were less distracting.
 |
| Image 1 |
Image 2 - Better reflection, like colours - blue/orange contrast, old/new contrast, regeneration. Be careful with position of bridge - gets lost within image.
 |
| Image 2 |
Decided not to take this forward. Some more inspiring bridges along the Trent. Drawn to it because of the environment.
Newark on Trent Town Bridge
Bridge very busy. Set camera up on tripod and waited....and waited....and waited. People enjoying the sun, busy with cars. Best time of day to photograph is late afternoon sun to warm the stone, which is rush hour. Be creative...
Image 1- cropped out sky in camera. Building still in view behind railings. To clone or not to clone? History / geography / evidence. Consider number of arches to include, where to position boat? Need shorter, wide angled lens due to curvature of river and access. More space around frame. Like the boat, colour of stone and reflection creates a stillness over a busy river crossing. Need to sit with camera and observe light or take later in year? summer evening if I choose this one.
 |
| Image 1 |
Image 2 - Need wider lens and patience to observe the sun coming through the arches. At some point it will make the bricks inside orange creating contrast. Experiment with different lens - framing, number of arches.
 |
| Image 2 |
Jubilee Bridge, Newark on Trent
Image 1 - Busy, modern pedestrian bridge. Need to shoot quickly or plan shot due to amount of users. Tried different images with telephoto lens. Looking into sun - not ideal but could shoot in the afternoon with sun behind. Background is one of regeneration. Bridge walkway needs to be more dominant. With this lens had to stand on marina bridge.
 |
| Image 1 |
Image 2 - Side of bridge (Zig Zag) looks interesting when converted to monochrome. Like graphic lines, colours, shapes, see thru to other side. Bit narrow - maybe wider lens would help.
 |
| Image 2 |
Image 3 Lost the bridge! Good frame with wider, shorter lens. Want smoke upright. Possibility for reshoot.
 |
| Image 3 |
Definite reshoot for this bridge needed with wider angle lens
Fiddlers Elbow Bridge - Newark on Trent
Image 1- Busy section of river for bridges. Grade 2 listed bridge. Narrow, steeply arched bridleway across bridge. modern/old bridge, busy/quiet. Would like to isolate A46 bridge to left hand side. Like colours. Bridge detracts from background buildings, not quite high enough
 |
| Image 1 |
Image 2 - Need more space around this bridge with shorter, wider lens. Limited access. River bank very slippery.
 |
| Image 2 |
A46 Bypass Bridge Newark on Trent
Image 1- look at taking two exposures, one of underneath and one of supports and combining in Photoshop. Even using tripod it was difficult to get this straight. More inspiring bridges. Scrap metal yard underneath on opposite bank. Abandoned.
 |
| Image 1 |
Midland Railway Viaduct, Newark on Trent
Image 1 - long viaduct, A46 bypass at top of frame. Could lose it as distracting. Idea didn't work. Image looks very busy and difficult to pick out this part of the bridge.
 |
| Image 1 |
Image 2- Spray from weir at side of lock. Adds interest. Unsure about fence in foreground. Could do with more bridge on display. Like colours of metalwork on bridge.
 |
| Image 2 |
 |
| Image 3 |
Image 4- Slightly different position. Like this one. Made it into final selection.
 |
| Image 4 |
Newark Dyke Bridge, Newark on Trent
Image 1- Good view of bridge. Like reflection. Needs more room around frame. Will try wider angle another time - if not try full frame camera due to EFL.
 |
| Image 1 |
 |
| Image 2 |
 |
| Image 3 |
A1 bridge Newark on Trent
Image 1- tow path on one side of river only. Stops just before bridge. Accessible only by towpath as A1 is dual carriageway (safety). Today mud was too deep in places for walking boots. Not sure how it would be after heavy rain. Felt very isolated out here. Grade 2 listed building. Architecture was not obvious from distant view of bridge - however, on approach, became more interesting. Traffic - cars not too bad. had to wait for gaps in lorries or look at positioning of them.

Image 1
Image 2- Graphic design more interesting. Need cloudy day to soften shadows. This one is not monochrome but could convert. |
| Image 2 |
Image 3- View of underneath of bridge converted to monochrome. Stood directly underneath but doesn't look straight. Cloudy day needed to soften shadows.
 |
| Image 3 |
Image 4- taken underneath bridge to frame of church. Like golden colour and texture. Angle of curve on bridge needs work. Church too far away. Shadow too harsh. Try similar effect with another bridge.
 |
| Image 4 |
Reflection after day 1
- Develop possible ideas
- Abandon Mill Bridge, A1 bridge, A46 bridge
- Possibilities Town Bridge - time permitting - look at Farndon Bridge (may be able to frame Newark church)
- Definites to revisit Jubilee Bridge, Fiddlers Elbow Bridge, Midland Railway Viaduct, Newark Dyke Bridge,
- Add 24-105 mm lens to kit (EFL38-168mm)
- Train times
Day 2 20/1/14 Newark reshoot day with two lenses and visit to Farndon Bridge
Fiddlers Elbow Bridge
Image 1- better than on day 1. Wider, shorter lens used. Bridge higher than building. Liked colours. A46 Bypss bridge obscured. Reflection better. Would really like this square on but no access from river. Bridge does not look so steep using this lens.
 |
| Image 1 |
Image 2- Hadn't realised on first visit that towpath ran under the bridge and stopped. No further access due to house building along waterside. Considered this a possibility in monochrome. Liked spacing between vehicles contrasting with stillness of water. Shows three bridges. Having cloned out most of the branches obscuring the bridge, I decided not to proceed with this image - felt too cluttered.
 |
| Image 2 |
Jubilee Bridge
Image 1 - looking at diagonals. Converted to monochrome. Still too much happening in frame.
 |
| Image 1 |
 |
| Image 2 |
Image 3- (13:10) Difference of 2.5 hours gave me an image with lead in lines. Wind had dropped. A fortuitous glance at the sugar beet factory had me hurrying across the bridge to take this image. jpeg conversion enlarged is too grainy. Used RAW version for final image.
 |
| Image 3 |
Image 4 - still experimenting with side on view. Bridge too far away. Foreground too empty.
 |
| Image 4 |
Newark Dyke Bridge
Image 1- with Photoshop manipulation, I was able to improve this image. It was a bit of guesswork knowing where to focus with the train moving so fast. Trains frequented on average at half hour intervals; one in each direction. Trains looked better coming towards me. Long trains more impressive. Grey / yellow better than black / red or goods trains due to brighter focal point. lead in line visible.

Farndon Bridge
Tow path stops and goes inland so unable to use 200mm lens as not enough access. Church too far away to become focal point. Uninspired by bridge so crossed off list.
Summary
- Abandon Farndon Bridge
- Possibilities Fiddlers Elbow Bridge,Newark Dyke Bridge
- Definites Jubilee Bridge
Day 3 1/2/2014 Rain stopped, gale force winds - journey further north up the Trent
High Marnham Pipe Bridge
Unable to find - power station works - footpath closed temporarily and some under water.
Fledburgh Viduct
Access difficult as some footpaths under water
Image 1-Trent flooded over embankment and into flood plains.Converted to monochrome and replaced sky to remove distracting pylon. Like the way crop lines follow curve of arches and consecutive numbers on brickwork. Plants rubbed out of railings to give a cleaner image. Ethics - history/geography. Good picture but at the cost of removing evidence.
 |
| Image 1
Image 2- Arches from the other side. Interested in pattern caused by shadow, although curves of bridge not so impressive. Could reshoot earlier in day to get no shadow detail in arches and shadows coming towards me. Pylons in distance less distracting than in Image 1 original.
|
 |
| Image 2 |
Image 3- River in flood. Same pillars as Lady Bay Bridge in Nottingham. Not as powerful an image as I hoped. Distracting with current and wind blowing river, river being over the bank.
 |
| Image 3 |
Image 4- lens flare issues. Lens hood and polariser both on lens. Held hand over gap and extended over lens hood to prevent flare. Converted to monochrome and with some bank cropped, bridge shows form, strong silhouette and frames church / village well. Power lines distracting but all around due to geographical location between power stations.
 |
| Image 4 |
Dunham Pipe Bridge
River still over.Footpaths difficult to access.
Image 1- Too far away, tree distracting. Long thin pipe bridge. Very close to toll bridge.Tree obscures bridge. Grey bridge shows up well in sunlight.
 |
| Image 1 |
Image 2- Shows water pipe encased in metalwork. Need better angle if I pursue this one. From this angle power lines barely showed. Removed distractions in Photoshop. Ethics - geographical location.
 |
| Image 2 |
Image 3 - Had pylon on top of tallest part of bridge. Removed in Photoshop to neaten image. Reviewed other images on internet - all had distracting pylons. Will not pursue as unhappy with removing pylons.
 |
| Image 3 |
Dunham Toll Bridge
Image 1 - very close to pipe bridge. Flooded. had hoped to get underneath the bridge and take looking along bridge supports. Grasses distracting. Will need removing. Different view of a bridge using diagonal.
 |
| Image 1 |
Summary
- Abandon - Pipe Bridge, High Marnham Pipe Bridge
- Possibilities - Dunham Toll Bridge
- Definites - Fledburgh Viaduct
Day 4 2/2/14 In search of Nottingham's bridges
Clifton Bridge
Left for today. Nottingham too busy. Football match.
Wilford Bridge
Major roadworks on bridge. Unable to take photographs
Meadows Suspension Bridge, Nottingham
Image 1- Postcard image. River very wide. Chimney in background visible in sunlight. Look at closeup of towers, arches. Bridge very busy with pedestrians and cyclists.
 |
| Image 1 |
 |
| Image 2 |
Trent Bridge, Nottingham
Image 1- postcard view. Sunlight captures gold paint. Bridge is recognisable from location with clues such as football ground.
 |
| Image 1 |
Image 2 - Lights and modern lamp posts distract from beauty of bridge. Also partial building in background. Could remove - ethics -history. water looks murky (river in flood). Taken from other side (sun in wrong position). Would need sun lower.
 |
| Image 2 |
Image 3- Closeup removes distractions and modern day features keeping traditional lamp post. Sort out rotation of image of image. Handheld due to amount of people.
 |
| Image 3 |
Lady Bay Bridge, Nottingham
Image 1- If use this type of image, need to explore surroundings in more detail. No access on far bank. Underneath has interesting structure.
 |
| Image 1 |
Image 2- view from underneath adds interest with crates, sunlight, colours, lead in lines. Look at this one.
 |
| Image 2 |
Radcliffe on Trent Railway Viaduct, Nottingham
No access from Radcliffe on Trent. Need to investigate further on Google maps.
Summary
- Abandon Wilford Bridge
- Possibilities Meadows Suspension Bridge - need reshoot
- Definites Lady Bay Bridge, Trent Bridge
Day 5 2/10/14 reshoot day, Nottingham's Bridges
Radcliffe on Trent Railway Viaduct, Nottingham
Image 1- Detail of bridge showing gate of build, local constructors. Colours, weathering, graffiti, textures - rust
 |
| Image 1 |
Image 2- View from Nottinghamside (view seen most often when one searches for images of this bridge) Trees and wires distracting. Pylon noticeable. Shows 3 styles of one bridge. Like colours, path under bridge, river in flood but from here looks fairly still.
 |
| Image 2 |
Image 3- Different view from this side. More continuous arches right into distance. Strength of bridge shown. River appears more turbulent from here. Power lines distracting - no visible pylons. Over-exposed. Cloudy day needed for possible reshoot? (Weather over next few days when available - rain or bright sun - wouldn't make much difference)
 |
| Image 3 |
Meadows Suspension Bridge, Nottingham
Image 1 - retaken by standing on low wall. Wait for people to clear - even on a weekday. Perspective still looks like it is falling, even though it is as straight as I can achieve in camera. Buildings distracting. No wall on far side of river.
 |
| Image 1 |
Image 2- closer crop. Still not happy with outcome
 |
| Image 2 |
Image 3 - taken on walkway. Still busy. Straighten image and remove figure. Lead in line, space around building.
 |
| Image 3 |
Gunthorpe Bridge, Notts
Traffic lights in place. Traffic slowed so bridge felt safer from lorries. Able to pick moments to stand at edge of pavement.Image 1- forgotten this bridge has these windows. Questioned whether familiarity makes one overlook certain details and benefits of re-exploring can result in entirely different image from one which one set out to take. Not using this one.
 |
| Image 1 |
Image 2 and 3 - Look at combining together on Photoshop as one image. Bring boats nearer so more visible. View people think they see. Perspective, crop as necessary.
 |
| Image 2 |
 |
| Image 3 |
Summary
- Definite Radcliffe Railway Viaduct, Meadows Suspension Bridge, Gunthorpe Bridge
Day 6 19/2/14 Journey up the River Trent to the confluence and the Humber Bridge
Weather - patch of sun on arrival - disappeared within moments of setting camera up and became progressively cloudier throughout the day. Managed tourist image of sun shining on concrete pillar before sun disappeared.
Distance from home meant spending day at Hull and taking tablet to review shots. Hoping for night time shot. Easier to plan in daylight once aware of state of river bank, vantage points, effect of curvature of bridge with camera and lens.
Image 1- Underneath of bridge. Positioned off centre to see what would happen if line of view became diagonal. Foreground has some interest but not enough. If pursue this at a later date try longer exposure to smooth water.
 |
| Image 1 |
Image 2 - view from bridge looking along length of it towards Barton on Humber. may work well as large image if different focusing points used and images were stacked. Chose this side to pick up the road in the distance. If I stood other side, effect would be different. Demonstrates height of towers against scale of signposts. Repeating pattern, curves, diagonal all lend itself to monochrome.
 |
| Image 2 |
Image 3 - close up of diagonal support.Shows height, detail, not a stand alone image.
 |
| Image 3 |
Image 4 Night time image taken from Barton on Humber towards lights of Hull. Did not expect fall off to right of image. Need to straighten lamp posts.
 |
| Image 4 |
Image 5- Humber Bridge from high vantage point - on top of hill at Barton on Humber. Shows light trails across bridge and less river. Like stillness of river (long exposure). Too much ground detracts from river.
 |
| Image 5 |
Summary
Definite - image 4
Test shot retake Assignment 3 Monochrome (January 2014)
Following a period of stormy weather, the day I had planned for my retake photos for assignment 3 was extremely wet underfoot. As I was leaving the building, I caught a glimpse of the building in a large puddle. I experimented with my camera and after processing the image in Photoshop, was pleased with the result. I was unable to include it in the assignment rework so have included it here because I felt it was creative and a different take on the building.
 |
| 1/45 f5.6 ISO400 35x1.6=56mm |
To process the image, I set the black and white points and altered the slider bar of red, yellow and blue to the left and increased green, cyan and magenta. This had the effect of darkening the reflection of the house and showing the detail. I was not satisfied with the contrast so I selected the puddle and increased the contrast, and then increased the contrast of the earth by slightly less. I thought the building showed texture and tonal contrast. I kept the texture of the stones and leaves in the puddle for added interest.
Assignment 3: Test Shots Monochrome (November 2013)
This assignment explored the creative process of monochrome; from deciding upon
a suitable subject, photographing the subject taking account of the lighting /
weather conditions and processing the image using software to bring out the
form, tonal contrast, texture and if possible key of the image. To develop my
understanding of the subject of monochrome I had to process some images in a number of ways to see which I preferred.

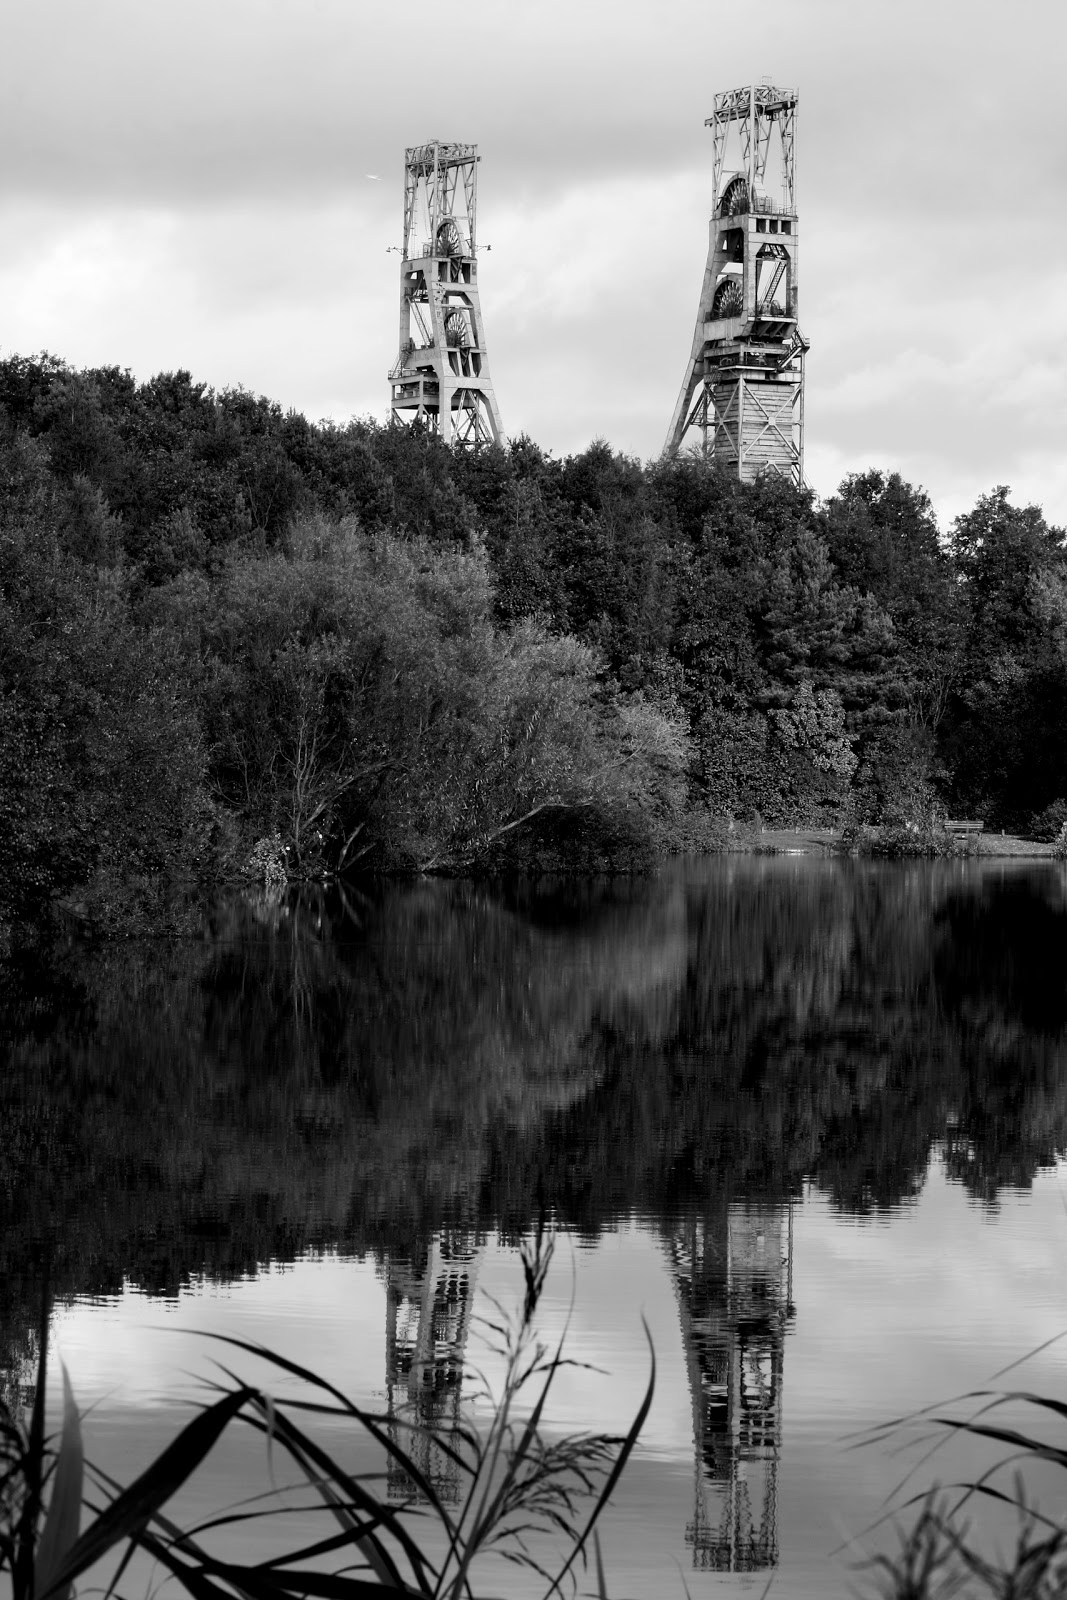
My original idea (October 2013) was to study the colliery headstocks at Clipstone, Notts. Although they are a Grade 2 listed building there is controversy as to whether they should be demolished. A report was "commissioned jointly by Newark and Sherwood District Council and English Heritage [following] an application to demolish the buildings, which have been defunct since Clipstone Colliery closed in 2003, to make way for development". "Its conclusion reads: “We would suggest that insufficient evidence has been provided to support the case for demolition." Chad (November 2013)

Walking around the site which had been turned into a country park some years ago, I used my 300mm zoom lens( on a tripod for stability) which when multiplied by a crop factor of 1.6 = 480mm. I was still unable to get close enough to the building to show the nuts and bolts. Also, the barren wasteland which was there in the summer was now grassed over. I decided to take a few images to see what the potential was, but I wanted close up shots and a flower (weed) on the wasteland to show potential new life. I was unable to take these as the building was also surrounded by fencing. I did notice artifacts which would have worked well in the images.


I considered combining this with headstocks which are being restored which have open days usually once a month. Unfortunately, being October already, I had just missed the last one for this year. It is a project which I can still explore. I think it is a good subject for monochrome, but one that has to be explored sooner than later because some local residents in mining areas see relics as an eyesore rather than a landmark.
Reference
http://www.chad.co.uk/news/local/clipstone-headstocks-future-remains-unclear-1-6238865 accessed 27/11/13

My original idea (October 2013) was to study the colliery headstocks at Clipstone, Notts. Although they are a Grade 2 listed building there is controversy as to whether they should be demolished. A report was "commissioned jointly by Newark and Sherwood District Council and English Heritage [following] an application to demolish the buildings, which have been defunct since Clipstone Colliery closed in 2003, to make way for development". "Its conclusion reads: “We would suggest that insufficient evidence has been provided to support the case for demolition." Chad (November 2013)
I planned some ideas around what I wanted and knew that access was limited but decided to go and have a look and see if my ideas were possible. The site was fenced off with guard dogs, security, and a PA system which was being tested at the time of my visit. I wondered if today was the day they were going to be demolished.


I considered combining this with headstocks which are being restored which have open days usually once a month. Unfortunately, being October already, I had just missed the last one for this year. It is a project which I can still explore. I think it is a good subject for monochrome, but one that has to be explored sooner than later because some local residents in mining areas see relics as an eyesore rather than a landmark.
Reference
http://www.chad.co.uk/news/local/clipstone-headstocks-future-remains-unclear-1-6238865 accessed 27/11/13
Idea 2
 |
| 1/350 F13 ISO200 32mm (x1.6 crop factor) |
This image illustrates 3 columns rather than 4. I felt that the curved shadow was distracting from the image. A focal length of 32mm x 1.6 crop factor equals 51mm. I had read that for buildings I should try a 50mm lens on a full frame camera. In my opinion the columns look as if they are leaning. I thought the image was better when the baroque work was included (as used in my assignment).
This image shows a different perspective of a single column. I thought the windows, although symmetrical, were distracting with the light coming through. Also the focal point is wrong for showing the texture. I would prefer this image if the focal point was at the bottom of the column or a larger depth of field used.
 |
| 1/125 F6.7 ISO100 18mm (x1.6 crop factor) |
The door scrolls offered potential for experimentation. Taken this way, the scroll shows form. Taken from the other direction, it is low key. I preferred the low key version as the background was less distracting and it became an abstract shape. The question was whether to leave it as taken or straighten. I preferred the original version.
 |
| 1/30 F16 ISO400 80mm (x1.6 crop factor) |
 |
| 1/180 F16 ISO200 90mm (x1.6 crop factor) |
The locked gate was across the basement staircase. I liked the texture of the paint which showed up well. I thought that this did not fit with the assignment story.
 |
| 1/6 F16 ISO400 80mm (x1.6 crop factor) |
I couldn't decide which converted image I liked best of the rear of the house. I had liked the photograph by Berenice Abbott of ""El second and third avenue lines" showing contrast, but did not want the contrast to be distracting. The first one was processed using a red high contrast filter preset as a starting point (on an adjustment layer after converting to black and white). I tweaked the colours until the house , drive and sky looked acceptable. The shadow of the church fell across some of the building and is dark which detracts from the image.
I also experimented with lightening the colour of the grass by moving the green slider. This made the building look desolate and the church's shadow disappear. I decided to go with a compromise between the two.
What I thought was interesting was how the difference in contrast made the form of the building change - pillars and door stonework stand out. I still like both images for different reasons.
 |
| 1/30 F16 ISO100 10mm (x1.6 crop factor) |

Assignment 2: Test Shots Seeing like your camera (September 2013)
For this assignment I chose 4 categories. I tested some images before deciding on the assignment shot or developing / abandoning an idea.
Street scene in the middle of a clear sunny day – narrow streets and high buildings which cast deep, long shadows
The old adage about considering what the view is like behind you made me question which end of the street to stand to take the assignment image. After I had taken what I thought was the image I would use, I photographed the street from the other end.

1/90 F16 ISO100 18mm partial metering daylight white balance
Photographing people in the shade while the background is in the sunshine
Having read around using partial metering for portraits, I tried it out. I felt that the technique worked; I needed to improve the composition.

1/125 F5.6 ISO100 50mm partial metering daylight white balance
Any backlit scene, whether in direct or indirect light
Having decided that I wanted to try out backlighting a flower so that it was translucent, I practiced to achieve the shot I wanted:
 |
| 1/500 F4 ISO100 70mm daylight white balance partial metering |
My first attempt at backlighting the lily to make the pedals more translucent. Need to improve composition and background.
 |
1/250 F5.6 ISO100 daylight white balance
partial metering
|
Using a darker background gave a more defined outline to the petal
 |
| 1/250 F4.5 ISO100 80mm |
Lily too white (overexposed) and burnout present. . Liked background and effect. Composition needs refining.
Indoor scenes illuminated by a single source of artificial light of high luminance
 |
| 1 sec F4 ISO100 32mm tungsten white balance partial metering |
Attempted to sidelight half a face with a diffused lamp. I did not like the shadow which I was unable to remove no matter where I positioned the lamp (distance from subject or direction). Decided after several tries to abandon this but keep images for reference.
 |
| 1/4 F4.5 ISO100 32mm Tungsten white balance partial metering
|
I looked at a salt lamp to see whether it was high luminance. Decided that it probably was not high enough. cast a very red glow on tungsten white balance which is what I saw. Decided to abandon the idea.
Assignment 1: Test Shots Workflow (July 2013)
As mentioned in Assignment 1: Workflow, I decided to take some time out and look at an area of photography where I needed to develop my action photography skills (sport of Mountain Biking).
Preparation for assignment 1: Workflow
I planned a flow chart looking at how I was going to get to where I wanted to be, and had already put together a more detailed one for use with my assignment. This allowed me to build in practice sessions and come home and review my shots and consider how to improve them.

Session 1 involved sussing out locations for possible shots which were off the beaten track. This would test out if the suggested camera settings and lenses worked for me. I decided at this point not to use flash because I was not familiar with it for action shots, and I hoped that being bright, my ISO would be enough.Having a pop up flash on the camera had allowed me to see what the effect of flash would be.
Review in detail suggested that actually to have movement shown on the images, I needed locations where I could have the rider going a little faster, otherwise the images looked static. The ISO needed pushing up really high which meant too much noise on the images which I found distracting.
I used the best images in the Editing exercise.
As an example of the type of results achievable with and without flash, this demonstrates the advantage of using fill in flash to brighten the subject.


1/250 F4 ISO1600 24mm (no flash) 1/200 F4 ISO400 24mm (fill in flash)
Session 2 Having decided that flash was definitely needed, I set about reading, then practising whilst my rider rode up and down the road allowing me to experiment without going far. There was more available light than working in a forest with tall trees, but it was enough to give me an idea of whether it may work.


1/60 F4 ISO100 24mm 1/60 F4 ISO100 60mm

1/60 F4 ISO100 24mm
Session 3 involved taking the family out and asking them to practice downhill berms, so that there was more speed with the cornering. As this section was under a fairly thick covering of trees, I was able to practice with flash. I found the lighting challenging as the weather was cloudy and sunny, so I needed to review my histogram in camera often and make changes to the ISO and shutter speed. I settled on what I thought was a speed which gave me some consistent results.


1/60 F6.7 ISO200 20mm 1/60 F5.6 ISO200 20mm


1/90 F5.6 ISO200 20mm 1/90 F5.6 ISO200 20mm
The advantage of using the 10-20mm lens was the wide angle, and when composition was chosen carefully, I was able to show more of the track. The recognised problem with it is that it shows some distortion, especially of the front wheel.
Session 4
I had planned this to be my final session (Assignment shoot), having acquired enough skills to enable me to take some action shots. When reviewing my images at home, I felt that my story needed to change emphasis to create interest, and what I had achieved so far was a group of images which were OK but needed to show more emotion. I decided I should have included a mixture of portraits and action. Nevertheless, I felt it was all good experience. The weather on this occasion too had been a mix of bright sunshine and cloud, and gave me the opportunity to work with the sun in the morning. The advantage was that I knew where the position of the sun would be for the final shoot. I was able to try out some positions on the side of the track, and experiment with where I needed to be to see the bike in the air.


1/90 F6.7 ISO200 24mm 1/90 F5.6 ISO100 24mm


1/90 F4 ISO200 28mm 1/90 F8 ISO200 24mm
So as for my flowchart, once I had decided not to pursue the final images for my assignment, I edited them up until the second edit, and processed the best in photoshop. I repeated session 4 again, only this time I used only images taken on this outing and created a folder with the final selects to be processed in photoshop.
No comments:
Post a Comment