Thursday, 31 October 2013

Black and White

Having thought about what may make good black and white photography subjects, I walked around my local nature reserve looking at the structure of objects such as telegraph poles and wires, texture of plants such as bulrushes (following an internet search I discovered they are also known as reed mace and cat tails) and contrast of objects such as berries / seed heads against a background.
I have previously converted photos into black and white from colour in Photoshop, so decided to see what happened if I set the camera to monochrome. It was good to review the image in the view finder in black and white because I could see instantly what had potential and what didn’t work or would require more work.

1/350 F4.4 ISO200 40mm
This pipe drains water from the nature reserve into a small pond. Normally I would not give it much time, but thought it could look different in black and white.
When I uploaded the image to Photoshop, the JPEG looked as taken in monochrome, but the RAW image was distorted in colour. The greens were not as I remembered them to be and the pipe looked a blue/grey colour. I had not expected this to happen. Having converted the RAW to grayscale, I was unable to alter the colour temperature, although the sliders did affect the look of the image.  I could not change much of the image using the colour sliders, so I used the JPEG version and applied the Silver Efex plug in software to it. Choosing the “architecture” increased the contrast and brought out more detail in the structure and surrounding concrete. I have since noted that I can apply the Silver Efex software and change the sliders.

I studied the zone system of exposure for the last assignment and can see that it works when applied to black and white photography. Underexposure worked better in some images. Framing is important because in some images I experimented with, the subject was lost in the clutter of grass and weeds. Simplicity was needed to reveal the structure or plant / seed head to be viewed.  Good contrast was necessary to make certain subjects stand out; e.g. black berries against pale leaves stood out, whereas some autumnal leaves against a blue sky actually looked better in colour than black and white as there was little contrast.
Researching my local library around the subject of black and white photography, I found a useful chapter on Silver efex pro which worked through processing with this add on to Photoshop in more detail.
Having read Beardsworth's chapter on Silver efex pro, I experimented using his method of applying silver efex as a smart filter which I had not used previously, which allows one to open the layer and return to any changes which have already been made without starting from scratch. I worked my way through the described workflow to see what effects could be made as I have only applied filters in the past. By using the selective adjustments control points, I was able to darken the stone in the left hand bottom corner which took the focal point away from this and into the pipe. 
Bibliography
Advanced digital black and white photography, Beardsworth.J, 2012, Ilex press, Lewes, UK p82-89
The complete guide to black and white digital photography, Freeman.M, 2009, Ilex press, Lewes, UK

Friday, 4 October 2013

Interpretative processing

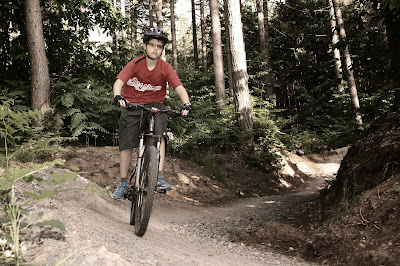
For this exercise I took an existing image from Assignment 1 and looked at processing it creatively in three different ways. It was taken late afternoon so there is a warmth to the image and probably too much contrast.
Original
1/125 F4.5 ISO400 24mm (x1.6 crop factor) evaluative metering,
 daylight white balance, flash


Image 1

I experimented with toning down the colours and giving this image a more urban feel:
Opened in Photoshop CS3

> Adjustment layer > curves > set tone with grey dropper tool on grey tyre
> create new adjustment layer > gradient map > box 3 black and white
>layers opacity slider to merge the two layers together
>adjustment layer > photo filter > warming filter (85) >34% density
> flatten image
> save as

At the stage of merging the image together, I realised my son’s legs and face looked slightly grey which was the effect of using black and white. So to warm up the image, I applied a gold filter. This worked, but not as effectively as I would have liked. I thought the overall effect of the image was acceptable and could work applied to a muddy image. The effect was not dissimilar to a preset effect in my add on software for Photoshop.

Image 2

Over the summer, war time history of Sherwood Pines has been brought into the public eye with the building of a replica WW1 trench. I discovered that some of the interesting circular trenches the local mountain bike enthusiasts called “bomb holes” were just that. Circular trenches had been built by the Royal Fusiliers in 1915 for artillery practice. I found a few old photos on the internet and recalled an information board about Lord Kitchener with of photos WW1 at the start of the cycle trail  named after him. What I hoped to achieve was the tones seen in world war 1. These had alot of dark contrast on the people and buildings and light sky and ground.
Opened in Photoshop CS3
> Adjustment layer > curves > set tone with grey dropper tool on grey tyre
>Filter > Nik Software > Silver Efex Pro > dark sepia
> flatten image
> save as

I was pleased with the recreation of this type of image. Although it is a preset choice, It took experimentation and comparison with old images to choose the right look, so I feel I have gained from the process.


http://www.bbc.co.uk/news/uk-england-nottinghamshire-24231397 accessed 4/10/13

Image 3


What I really wanted to do was change the daylight to night time as we do alot of night riding in the forest in the winter. However, after experimenting and reading several      forums, I realised that it would be easier to take a night time picture!

I decided instead to further investigate the efex add in and see what I could make work with a high contrast image. I liked antique plate 1 because it made the central image stand out, kept the tones mid range and made the viewer focus on the image.

Thursday, 3 October 2013

Managing tone

The aim of this exercise was to explore how to alter tones of an image using processing software. I have always used Photoshop for  JPEG images and Digital Photo Professional for RAW. I researched altering a RAW image in Photoshop. Although previously I made changes to images in Photoshop through curves, I discovered that I hadn’t made the connection between the highlights, shadows and midtones and decided to investigate further at this point.

Following on from the last assignment work, I wanted to look at a low contrast images so I started with a photo taken on a misty morning of a cement works in the distance looking across the fields.

Original

F16 1/45 ISO100 32mm  (x1.6 crop factor) partial metering
daylight white balance


JPEG


Opened in Photoshop CS3
> Adjustment layer curves 1
> select clipping
> set black and white points
> altered curves based on preset lighten > check > further lightening required by moving the curve freehand
> crop
> flatten image
> save
I looked at altering the colour temperature (white balance) for this image and decided it did not require any changes to be made for my personal taste.

What I learnt from this exercise which I did not do/know beforehand:
  • I used to add a duplicate layer to work in. I discovered that to set the adjustment layer of curves opened the curves box (time saving)
  • A tutorial I read suggested that if the clipping box is ticked, the slider can be moved until pixels start to appear. This sets the white and black points accurately.
  • There are preset curves which give an idea of how the image may look if you lighten or darken the image using curves.
  • The graph has three points where it can be altered and what each point referred to. Watching the histogram as the curves were changed gave an idea of what was happening to the image.

RAW


I had not worked in Photoshop with a RAW image before, but discovered limitations with my existing software. Once I found my way around the layout, it was straightforward.
> Opened in Photoshop CS3
> Select tone curve
> Select parametric (sliders) to lighten image whilst observing image/histogram
> Highlights +55
> lights –7
> darks +28
> shadows –5
> Reviewed original image
>changed to point (tone curve) to check image (graph)
> crop
> save

I found it easier to use the tone curve than the 1st set of sliders for this image.

Overall, I prefer the RAW conversion because it is how I remember the scene to look. The mist is more even and the greens of the grass are less bright. I think in this instance, I achieved a more pleasing result.
                                                               
Bibliography
http://www.cambridgeincolour.com/tutorials/photoshop-curves.htm accessed 30/9/13
http://www.digitalcameraworld.com/2013/03/18/photoshop-curves-tool-6-techniques-every-photographer-must-know/7/ accessed 30/9/13